
Instructor Information
In order to host your courses on PropDanceCulture, you will need to apply for a Vendor Membership, or, Vendorship. With a Vendorship account will be able to both sell your courses through your own branded store front AND sell physical products if you so chose. You will be given a dashboard through which you can organize your store and conduct sales. Your store and courses will be able to receive reviews and will be listed under “Our Community >Community Shops” as well as “Our Universities>PropDanceUniversity, PropSpinUniversity, Flow Arts University, or Movement University”. The listing depends on which University you choose for your course to be listed under.
The process to become a PropDanceCulture Vendor/Instructor is as follows:
(1) Make an account on the PropDanceCulture Website and select the “Professional/Instructor” membership level if you want to support Tyfoods (Membership level is optional!)
(2) Once you’ve completed that step you may go to “Your Account>Apply for Vendorship”
(3) Once applied, PropDanceCulture will review your application
(4) If accepted then you can begin listing your courses and products! (See more information below!)
Our Universities
- Prop Dance University – Involves all teachings focused on the unification of Movement, Dance and Prop Spinning. In other words, PropDanceUniversity contains courses that teach you about how you can combines ideas, principles and concepts from these three disciplines into one unique art form.
- Prop Spin University – Involves all teachings that are focused primarily on object manipulation, juggling and prop spinning.
- Flow Arts University – Involves all teachings that are related to the art of getting into Flow. Courses here are focused on Flow states and how you can get into them.
- Movement University – Involves all teachings that are focused on body movement. This includes dance, mobility, acrobatics, contortion, gymnastics, tricking, etc…


Vendorship/Instructorship benefits include
- Your own branded store front
- Promotion from PropDanceCulture (Shoutouts on social media)
- Your products and services among PropDanceCulture products
- Your courses listed under one or more of our universities
- Ability to issue coupons and offer virtual/digital products (such as gig packages, online lessons & downloadable content)
- An easy to use back end for your store
Terms
If extra advertisement is desired, OR if you want to support PropDanceCulture, then you can donate $5 per month to receive shout outs/promotion through PropDanceCulture, Tyfoods and Flowstagram.
PropDanceCulture takes a 3.5% fee from the retail price of the products and services sold via the PropDanceCulture Website.
PropDanceCulture reserves the right to remove products listed by vendors due to reasons such as overlapping or duplicate listings and quality control of products.
As a multi-vendor website, the goal is to make sure that there are not duplicate items from separate vendors (I.E. Multiple vendors selling the same exact item. In other words multiple vendors listing individual “Capsule Lights by FlowToys” for sale). Additionally, PropDanceCulture wants to be sure that the products listed are of the highest quality.
Once you’ve become an Instructor here’s what you need to know
- Getting familiar with online instructing
- Creating your first course
- Listing your first course in your store
- Withdrawing your earnings (Picking up your paycheck)
- Earning money through invitations
Getting familiar with online instructing
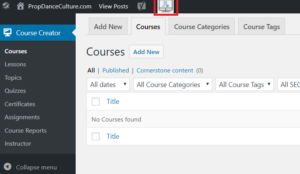
When you login you will now be able to create courses with our course building tool. Go to “Your Account-> Course Creator” to access your course building tool! You will see a menu on the left side of the screen with a tab titled “Course Creator”. Under this tab and you will various sub-tabs. These sub-tabs will be “Courses”, “Lessons”, Topics”, “Quizzes”, “Certificates”, “Assignments”, “Course Reports” and “Instructor”.
Note: You can get back to the original site by hovering over the “PropDanceCulture.com” button in the top left corner and then clicking “Visit Site”. Click “Your Account->Course Creator” to navigate back to the course building tool!
You can use the button highlighted below to access your store front!
Here you will be able to add your courses to your store front as well as put your other products and services up for sale! More on this later.
Creating your first course
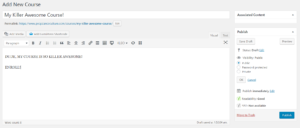
Click on the “Courses” tab to begin creating your course.
Click on “Add New”. From here you will be able to title your course, create the course description, select the university your course is under, set a featured image for your course, set your price and course price type, create quizzes, lessons and topics, assign required membership levels, customize the SEO settings and more!
Note: On the right hand side of the screen if you scroll down you will see these tools:
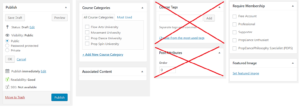
Note: The “Publish” tool allows you to publish your course or save it as a draft, you can add password protection, privacy, and even time when your course becomes published! “Course Categories” tool allows you to assign your course to one of our Universities (there may be more than as pictured), The “Assign Membership” tool allows you to give course access to PropDanceCulture members with specific memberships. The “featured image” picture allows you to specify what image will be featured for your course in your students “Courses” tab. You can ignore “Course Tags” and “Post Attributes” 🙂
Scroll down further and you will see “Essential Grid Custom Settings”
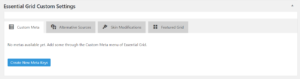
Ignore these for now, as they are advanced settings!
Scroll a little further and you will see “SEO”
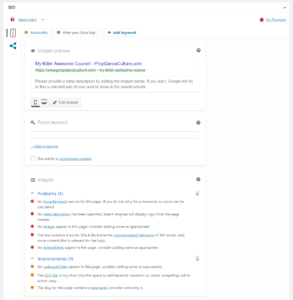
Here you can customize your SEO settings to help your courses be found by search engines!
Scroll a bit further and you’ll find more things to ignore!
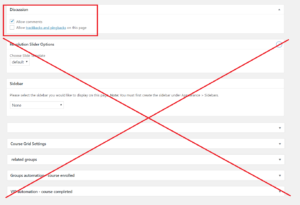
These are advanced/incomplete functions that require some more work before you have access to them! The only thing of importance here is “Discussion”, it’s recommended that comments be turned off. Ignore the “Allow trackbacks and pingbacks on this page”
However you will see “Course”
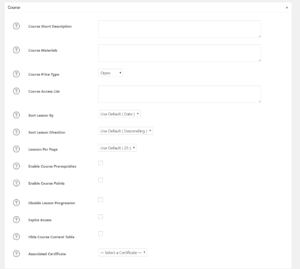
Here you can edit your course settings! IMPORTANT: DO NOT set your course to “Open” otherwise everyone will be automatically enrolled to your course for free! Setting the course to “Free” or “Closed” are usually more appropriate. However, the choice is yours!
To begin creating your quizzes, lessons and topics, scroll to the bottom of the page and locate the “Course Builder”. It will look something like this:
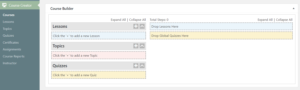
Press the + button to add new quizzes, lessons or topics. This is where you’ll name your quizzes, lessons and topics.
Once you’ve created Lessons, Topics and Quizzes, you can arrange in your desired order on the right side of the screen by dragging these items onto the right side.

Once you’ve created your items, you can edit those items by using the sidemenu on the left, simply click on lessons, topics, or quizzes, and edit them as desired. This should be pretty self explanatory, but please reach out to Tyfoods if you have a problem.
For this example, we’ll look at lessons
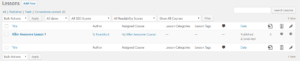
Click the lesson title in order to add to, or edit, your lesson material
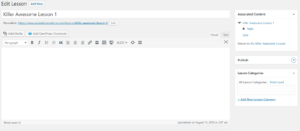
Videos are not uploaded directly to PropDanceculture. Instead, videos are hosted on third-party websites such as Youtube, Vimeo, Wistia, SproutVideo and DailyMotion. In order to add a video to your lessons, videos and topics, you’ll need to click the “text” toggle button in the top right of the text box. This will enable you to access the HTML code responsible for your course content, don’t worry, you don’t need to know HTML code.
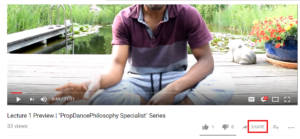
Go to the Video Hosting website of your choice, in this example we use YouTube
Click the Share Button on your Unlisted Youtube video
That will bring up this pop up
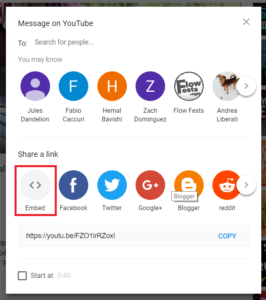
Click the “Embed Button”
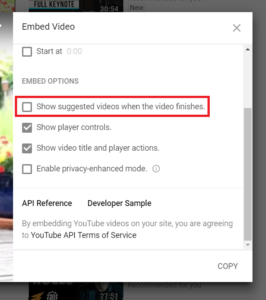
Uncheck the “Show suggested videos when the video finishes.”
Scroll up, and copy the code that is shown in the box
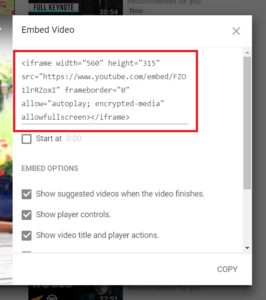
Then paste the code into your text box. Click the “Visual” box in the top right corner, and your video will be available.
You can add all the text you’d like here. Here’s an example:
The process is identical no matter what video hosting platform you use. Find the embed code, copy it and paste it into your textbox on your lesson, topic or item while your textbox is in “Text” mode. Finally, toggle back to “Visual” mode.
If you scroll down from your textbox, then you will see “Lesson”. These are your lesson settings
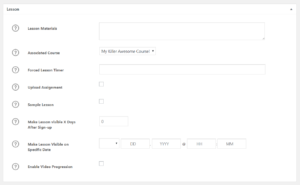
These settings should be pretty self explanatory, but please reach out to Tyfoods if you need help!
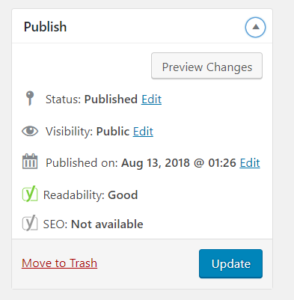
Be sure to click the “Update” button to save all changes to your course!
Listing your course in your store
Once you’ve added quizzes, lessons and topics to your course and added course material to those different course items. You will then be able to list your course in your store front!
Exploring your store backend!
You can do this by navigating to “Your Account -> Your Shop”, or by clicking on the highlighted icon from the Course Creator toolbar
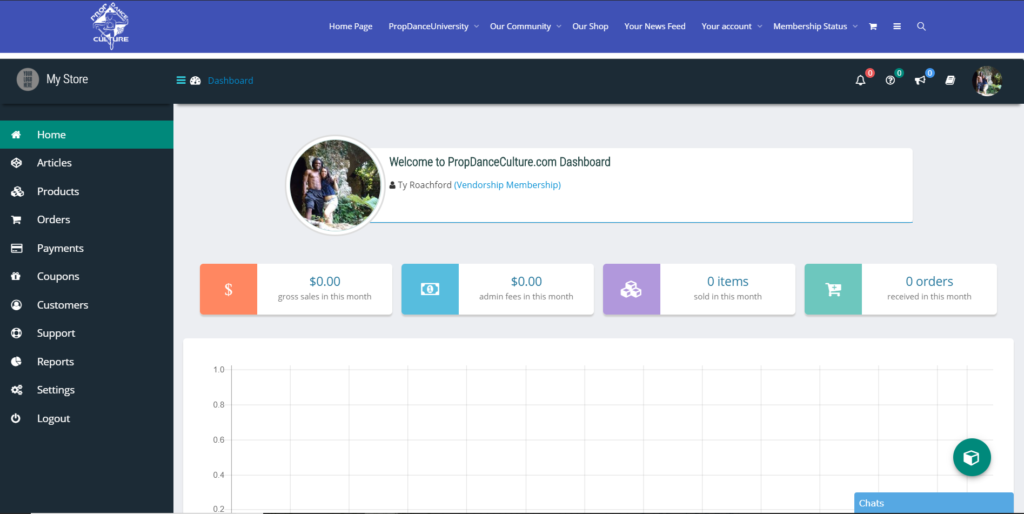
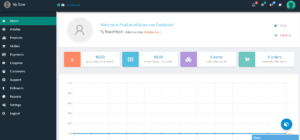
Once you’ve accessed the backend of your store, it will look like this
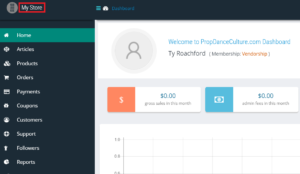
To access the frontend of your store click the “My Store” text! (For now it doesn’t work when you click the logo picture)
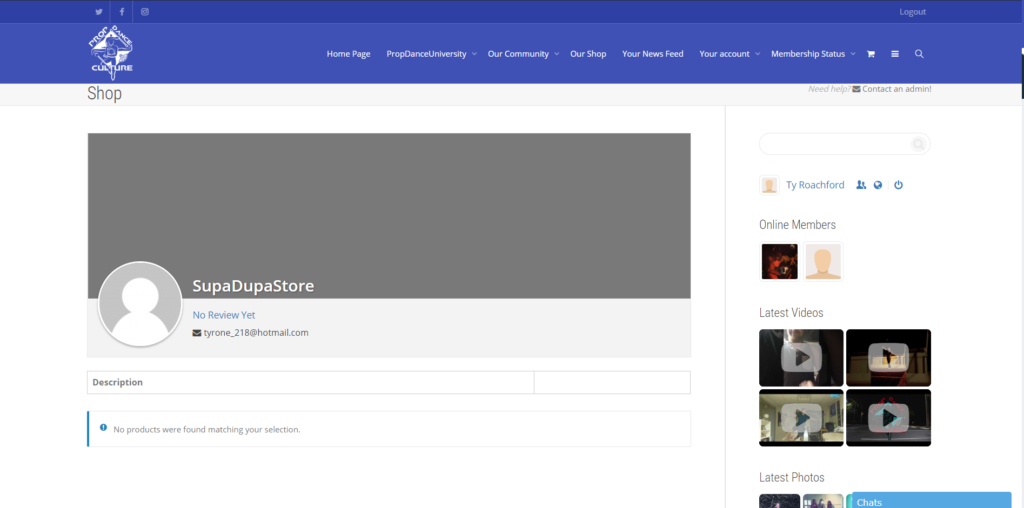
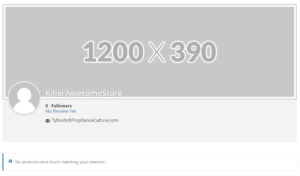
You should see your store front looking a little something like this
You can navigate to your back end by clicking “Your Account->Your Shop”, or pressing the “Back” button on your browser.
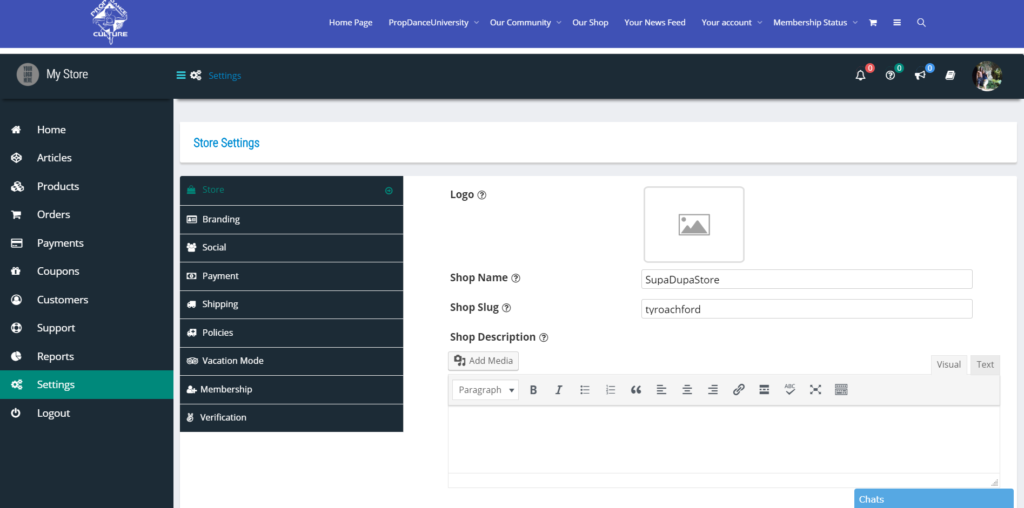
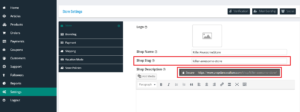
To change your store URL (www.propdanceculture.com/shop/YOUR-SHOP-NAME) You can navigate to settings and change the text in the highlighted box
Feel free to explore other settings so that you can fully customize your store! We’ve tried to make it easy to figure out, but if you have any problems, please send a message to @Tyfoods!
Adding your first course
To add your first course, or product, go to “Products” and then click “Add New”
You’ll see many different options, highlighted are some of the most non-obvious options to be aware of.
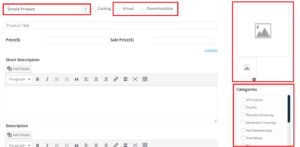
Simple Products are products that do not have variations/variables. Variable Products are products that have many different variations/variables, for example, if you sell shirts, then shirt colors/sizes are different variables.
Virtual Products are typically courses, gig packages and other non-physical entities. Downloadable products can be courses, files or other digital products which the student downloads onto their own computer for personal access.
It’s likely that your course is simply a virtual product if there is nothing to download. This is the recommended option.
You can add pictures for your product with the highlighted box above “categories”.
With the categories box, you can select which part of our shop your item belongs too. If you’re creating a course, you should likely select “All Products” and one of our various universities. Please do not pick multiple universities. Instead, pick the most fitting university.
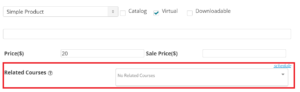
NEW: Be sure to select the course that you’ve created using this feature. This links your “Course Product” to your actual course. Selecting your course here will allow those who purchase your course product to be automatically enrolled!
After you’ve completed your course listing, scroll down to the bottom and click “submit”, or if you’re not finished, click “draft” as pictured as below

Go to the front end of your store by clicking “My Store” in the top left of your shop backend like you did previously.
Once you’re here, you will see that your course/product has been added to your store!
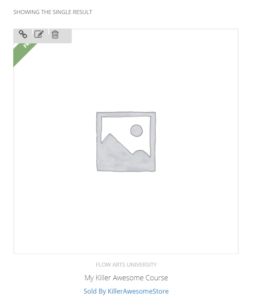
You can use the buttons at the top left of your course/product to quickly delete, edit or share your item!
Please contact Tyfoods once you’ve completed your course listing! Tyfoods will link your course to your product so that your students get instant access to your course! Tyfoods can also create a private group for your students on our platform so that you and your students can share with each other in a private setting. Your students will be automatically added to this group once the group and your course have been linked. Please let Tyfoods know if you’d like this option and he’ll set you up!
CONGRATULATIONS ON MAKING YOUR FIRST COURSE!
This is an incredible step in your career as a movement artist and we are happy that we are able to provide a platform that can help you achieve your goals! There are many students out there who don’t have the means to get to the right teachers, and there are many teachers who don’t have the means to get to their potential students!
Online courses are an incredible solution for connecting teachers and students all over the world.
By teaching on this platform, you are contributing to something great. Accessibility of knowledge has long been a problem and sometimes still is! By providing online resources, whether they are free or paid, you are making knowledge more accessible and facilitating the personal growth of people all over the world. Thank you in advance for spreading knowledge.
Withdrawing Your Earnings
So, you’ve sold a course or two and now it’s time to “pick up your paycheck”. Any time you’ve sold a course, your earnings will go into an account where it will wait until you’ve withdrawn it. (Tip: Paypal + Stripe Fees are lower when the overall withdrawal is larger. Withdrawing larger amounts is better for avoiding extra fees!)
To withdraw your earnings, navigate to your store dashboard and find the “payments” tab. Click this tab and you will see “withdrawal” in the top right corner.
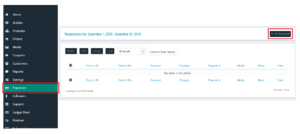
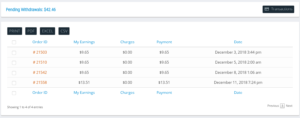
This will bring you to a new page which will show you the earnings that you’ve not yet withdrawn, I.E. “Pending Withdrawals”. As well as a breakdown of each individual earning (I.E. each course/product order that you’ve received).
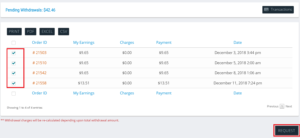
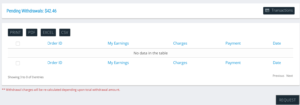
Select all of the earnings that you desire to withdraw and then click “Request”. You may then see that the individual earnings have disappeared, but that the “Pending Withdrawals” number stays the same. This means you may have to wait up to 24 hours to receive payment. In most cases payment will happen automatically, and thus you should see a notification from stripe or PayPal that you have been paid!
CONGRATULATIONS ON YOUR FIRST PROPDANCECULTURE PAYCHECK! ?
Earning Money Through Invitations
Coming soon
